
As marketers, Hubspot and other similar CRM tools are something we use frequently. In short, they make our lives easier. The ability to keep a catalogue of contacts and to then email them as a group, but for them to receive the emails individually as well as personally, is invaluable. There’s also the analysis aspect of Hubspot which makes it all the more worthwhile. The insights you gain into the performance of your marketing techniques can continuously improve your results.
All of this then comes together into an automated experience through workflows, the cherry on top. There’s a number of different ways you can take advantage of workflows, but the best way for you to find out what works for you is to test and learn from your own methods. However, if you want to know some places to start, I’ve got you covered.
Enrollment Triggers
It’s worth noting that when you are creating a workflow, you can choose different ways for a workflow to start. You can either turn it on yourself and it will start as soon as you do, or you can center it around a date. This is good for setting it up in advance and you can leave it to start on it’s own, for the date and time that you set. Another option is to center it on a date linked to one of your contacts, like the day they signed up for something or their birthday. This can be useful for B2C companies that are looking to improve customer relations and maybe even provide special promotions.
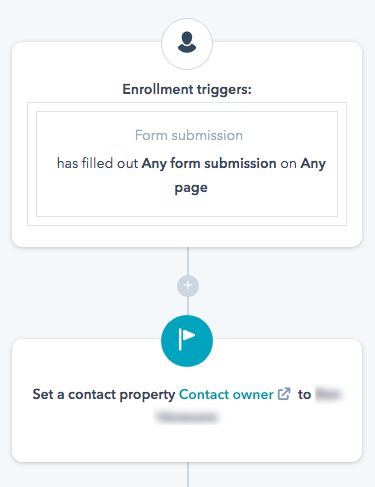
Once you’re on a workflow, the first thing you need to sort out is the enrollment trigger. There are many options on how to filter contacts into a workflow, but there’s a few that I find the most useful that you should be aware of. List memberships is the path I usually choose to enroll contacts; I’ll already have contacts on Hubspot that are in named lists so I can simply add them into the workflow. If you haven’t managed to get your contacts into a list yet but still imported your contacts together, then you can also enroll by the import.
Another useful enrollment trigger is the form submission option. This is perfect for sending follow up thank you emails to customers for filling in forms on your landing pages. As well as this, it’s great for adding contacts straight into a mailing list workflow as soon as they’ve filled out the form.
Then there’s page views, which can be super useful in following up on customers’ intrigue. If you were to send out a marketing email with a link to a landing page, then you can use this enrollment trigger to send another email when they view the page. This can be a great way to get that first conversation started as they’ve shown some sort of interest in what you have to offer as a business.
Time Delays
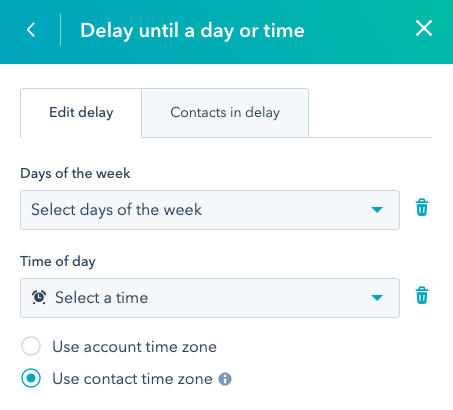
Quite a simple and easy to understand part of a workflow, time delays’ importance shouldn’t be overlooked. For example, imagine that you were setting up with a bunch of email reminders for your contacts about an event that was coming up. Turning on the workflow without time delays would just send all the emails straight away one after the other, which wouldn’t be very beneficial for anyone.
TIme delays support the automatic process greatly. Long gone are the days when you’d have to remember to send that follow up email yourself, you still have to write it but at least now you can have it all set up in advance! You can conduct a time delay either for a specific date and time or for a set number of days, either way works just fine.
If/Then Branch
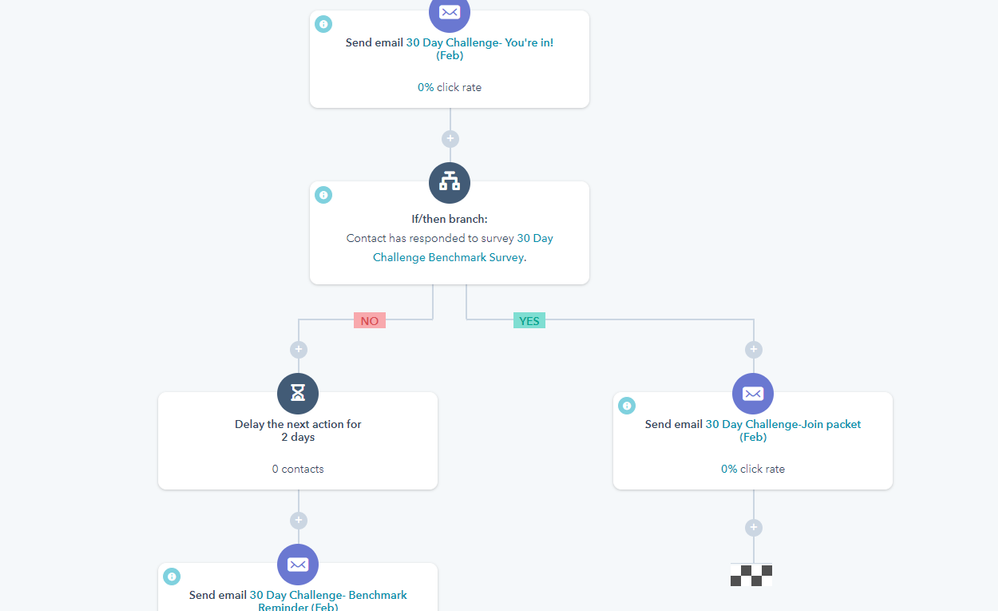
Time to broaden your horizons; the if/then branch on a workflow really does make the possibilities endless. This action is similar to enrollment triggers as it deals with the same filters. You can filter through list membership, form submission, page views and more. The if/then branch splits the contacts in the workflow down two routes by the action they have or haven’t taken.
So if, for example, you send a link to a form in your marketing email; you can then select that form so contacts who have filled it in will go down one branch and those who haven’t will go down another. This way you can have emails already set up to send to those contacts who have signed up for that specific form.
Essentially, the if/then branch allows you to separate a list of contacts into those who have shown an interest in what you’re promoting and those who do not. This is fantastically useful for discovering where there might be opportunities for new customers or clients. It works both ways too, as you will now know which contacts that you maybe shouldn’t be spending as much time on selling to.

It’s all semi-automatic
The best way to learn about Hubspot automation is to have a go yourself at creating a workflow, experimenting with the many different filters and options. Once you’re happy with a workflow, just ensure you double check everything is working by testing it before activating. If there’s anything you don’t understand or can’t figure out, then Hubspot has an extensive community forum filled with all the answers you could ever wish for.
What I will say is that there’s still a lot of manual work to do: adding contacts, creating emails, setting up the workflow, ensuring everything works smoothly. I’d say it’s semi-automatic, but once the workflow is live then you can sit back and relax.